Good quality MTB tyres aren’t cheap and some will set you back more than a decent car tyre. So it can be pretty shattering if you slash the sidewall on a $100 tyre after a handful of rides. Rather than rather adding it straight to landfill or reserving it for inner tube use only, why not salvage the badly damaged tyre. We’re not guaranteeing these techniques will fix every problem but they may offer you some hope.
Minor Cuts
First up, let's look at the basic method for repairing smaller nicks and cuts.
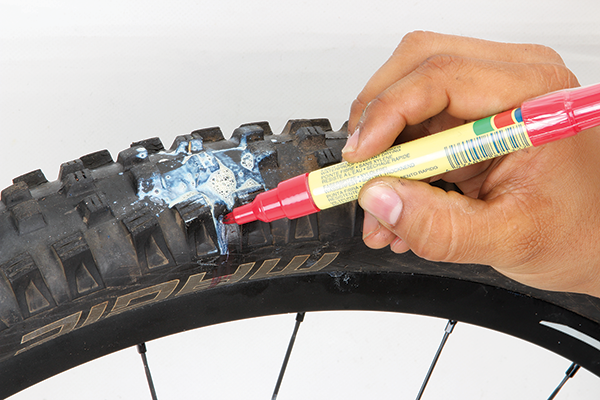
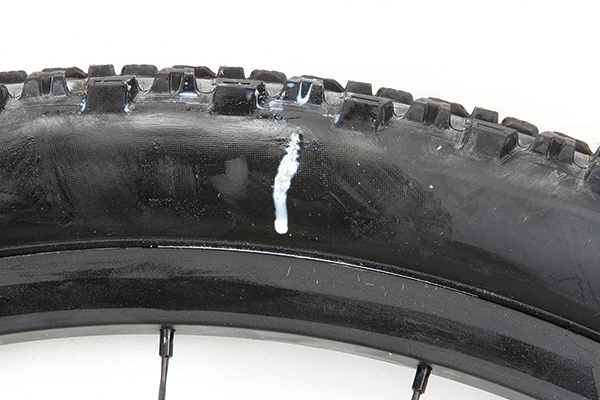
Sometimes sealants struggle to repair smaller cuts. You may make it home without reinflating the tyre but the 2-3mm cut keeps opening up and weeping air and sealant whenever you ride. Start by locating the hole; easy to do if you’ve got reasonably fresh sealant inside. Use a marker pen or crayon to mark the spot.
Pop one side of the bead off and scoop out any remaining sealant. Pour it into a bottle as you’ll be able to reuse it. Leave the wheel hanging for a while as the sealant can take some time to pool at the bottom. Once you’ve salvaged the sealant, remove the tyre and clean the inside. Give it a good wipe out and rinse it with water before letting it dry.
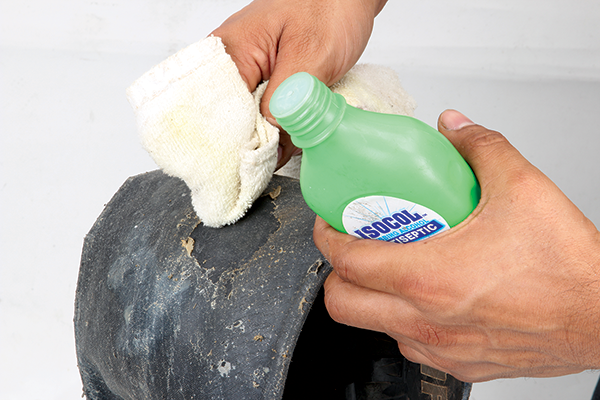
Look for the spot that you marked on the sidewall and locate the hole. Turn the tyre inside out and remove any dried sealant from the area; rubbing with your fingers should get most of it off. Resist the temptation to use something abrasive as it could damage the tyre casing. Clean it with isopropyl alcohol or a similar product to remove any oil or waxy residue.
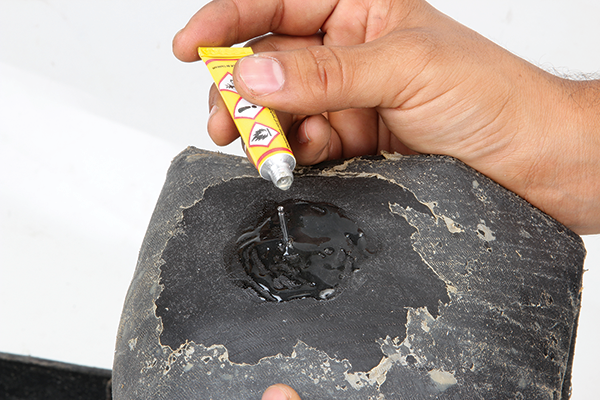
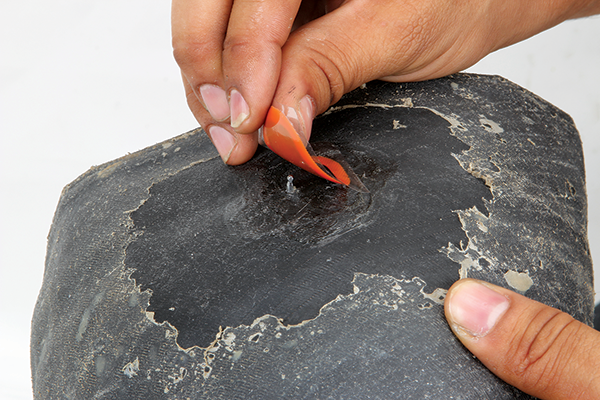
Use a regular puncture repair kit to patch the inside of the tyre. Apply a layer of glue around the hole, ensuring that you cover an area that’s larger than the size of the patch. It’s easy to lose the hole once the area is coated in glue; poking a small pointed implement through the hole will serve to mark the spot.
Let the glue dry thoroughly before applying the patch—this may take five or 10 minutes. The patch won’t adhere properly if the glue is still wet and shiny so be patient. Peel the backing off the patch but leave the clear plastic cover intact. Locate the hole and apply the patch right over the top.
Press the patch down to help it bond. To do a really good job, mount the tyre with an inner tube and inflate. Leave it overnight and the tube will hold the patch firmly in place while everything sets. We’ve patched many tyres using this process and the repair has lasted for the life of the tyre.
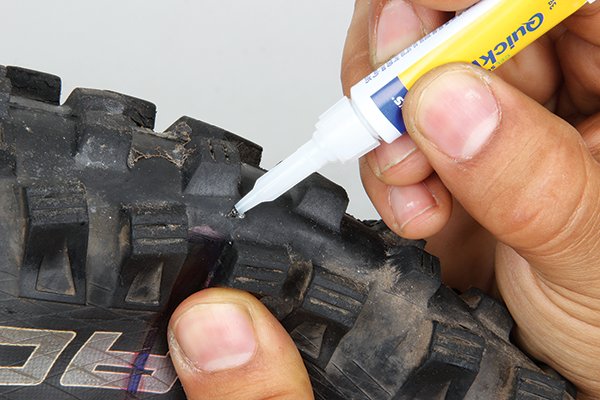
In some cases the patch just won’t take to the tyre casing—certain tyres seem harder to patch than others. If the tyre is tough to patch, try placing a blob of superglue into the cut. The glue will hold the rubber together and give the sealant something to coagulate around. Some choose this as their ‘go-to’ repair method as you don’t even need to remove the tyre.
Major Cuts
Sometimes the damage will be too great to repair with a patch alone - the pressure inside will force the rubber out through the hole. With larger cuts I've found that stitching the casing up can provide a reliable long-term fix.
I started stitching damaged tyres around 30 years ago. In some cases it was repairing punctured ‘tubular’ road tyres and other times I’d be fixing MTB tyres with sidewall cuts. As a young racer you couldn’t afford to throw decent tyres away. Nowadays this technique works equally well on tubeless MTB tyres with slashed sidewalls and bigger cuts.
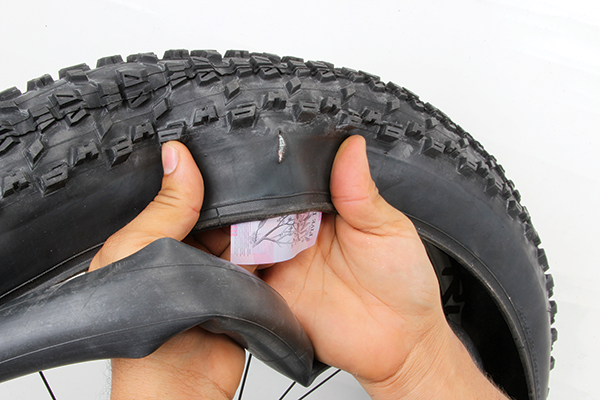
No matter how good it is, your sealant will never fix a hole like this. If you’re out on the trail, you’ll need to remove the valve stem and fit a tube to ride home. You will also need to place something behind the cut to stop the inner tube bulging out through the hole and puncturing. Plastic money works really well ($5 notes offer the best value but slip in $100 for maximum bling) but you can use a business card or some green leaves.
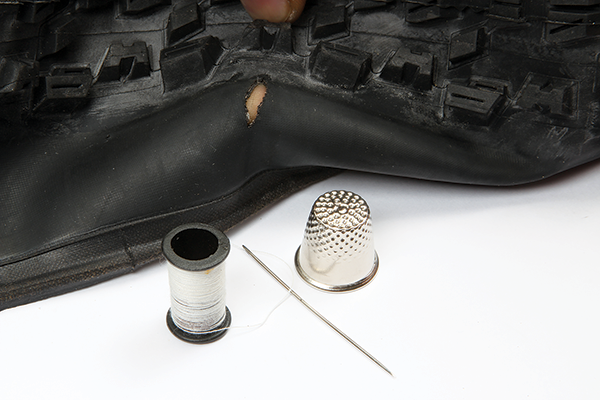
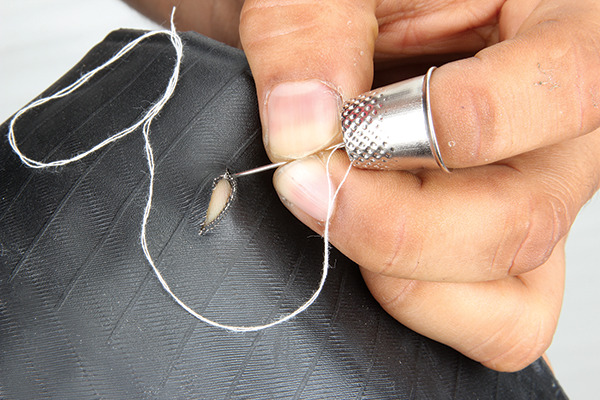
For the repair you will need a regular needle—don’t go too chunky or it’ll be harder to push through the casing and you’ll just make bigger holes. Common cotton or polyester thread is fine—it doesn’t need to be super thick. Porous thread is far better than nylon fishing line; cotton or polyester will absorb the sealant and become ‘rubberised’ like the tyre casing. A thimble will also come in handy for pushing the needle through.
Thread the needle and give yourself around 15-20cm of double line—don’t make it too long or it’ll just get tangled. Tie a knot at the end to stop it pulling all the way through. Turn the tyre inside-out and pick the starting point for your haberdashery. Push the needle through from the inside beginning at one end of the cut. Gently pull the thread all of the way through until the knot sits snug against the tyre.
Now push the needle back through from the outside on the opposite side of the cut. Again pull all of the thread through and snug it up to the casing. Make sure you are stitching through a solid part of the tyre; 0.7-1.0mm out from the cut will ensure that the thread won’t just pull through the casing.
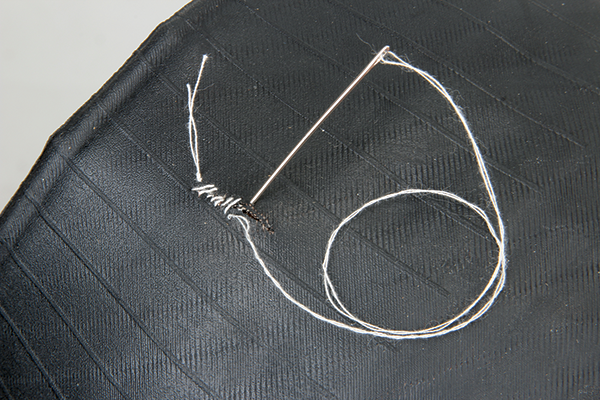
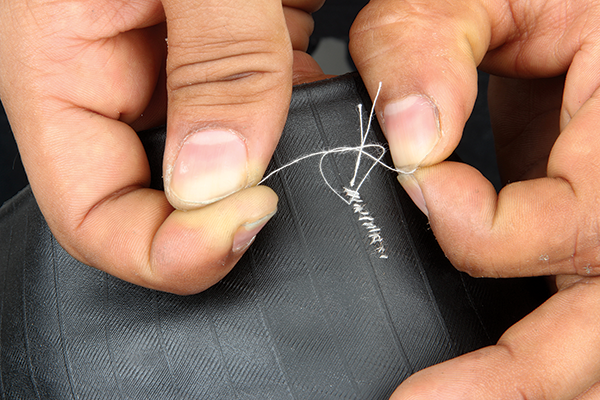
Continue stitching the tyre as shown. Once you’ve gone the full length of the cut, start working your way back until you’ve used up most of the thread. When there’s only 20-30mm left, snip the thread and tie the two ends in a knot on the inside of the tyre casing. Trim the excess thread but don’t go too close to the casing—it’ll be on the inside anyway, so nobody will see it. Your tyre will look a bit like a Frankenstein experiment from the outside but it should be nice and strong; pull and stretch the casing to check that it’ll hold together.
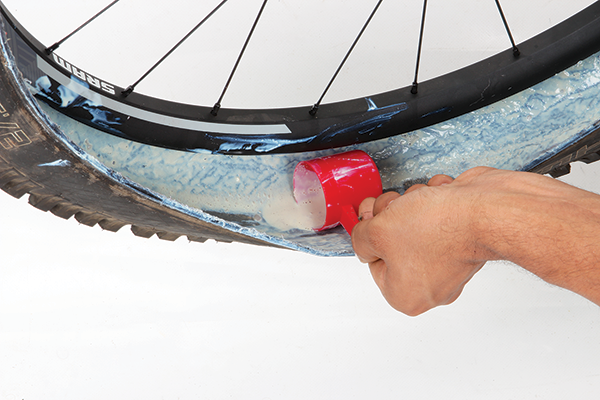
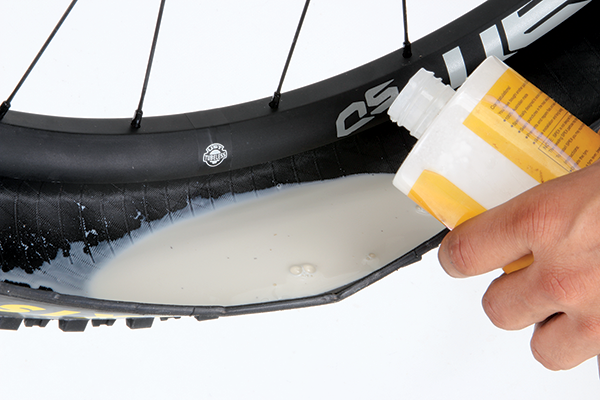
Now you have two options to finish off. Either glue a patch on the inside as described previously, or simply let the sealant do the job. Fit one bead and pour in the sealant; use a healthy serving, as you’ll lose a bit when the holes are being plugged.
Mount and inflate the tyre, then place the stitching at the very bottom of the tyre—you want the sealant to pool around the repaired section. With 30psi or so behind the sealant, it’ll be forced right through the thread and bung the whole thing up. Leave it to sit with the sealant pooled in the right spot and before long it should be fully airtight. To begin with it’s wise to check the repair regularly but there’s no reason why a good repair won’t outlast the tread.
The 2022 Checkpoint legitimately feels like several bikes in one - all road, adventure, gravel and super commuter. The design, finish, attention to detail and subtleties all add up to make a fantastic looking and exceptional performing adventure machine.