With the current trend towards single ring drivechains, ultra-wide range cassettes are becoming a hot-ticket item. Here we look at a more affordable way to get a wider gear range for your one-by conversion.
Previously we've looked at converting to a single ring using a one-by specific chainring. Running a single chainring offers a number of advantages. First up there’s the simplicity of only having a single derailleur; there’s simply less to think about with no crossover ratios or poor chain angles. It can save between 200 and 500g and it’s also nice to eliminate a shifter from your handlebars when suspension remotes and dropper posts only seem to add clutter.
Of course the main disadvantage is a reduction in your gearing range. For some this won’t be an issue but if you ride in a hilly area, or occasionally venture out to ride somewhere mountainous, the narrower gear spread may be tough to swallow. Eleven speed drivetrains go a long way towards answering this deficiency and the new SRAM Eagle 12-speed system takes it even further.
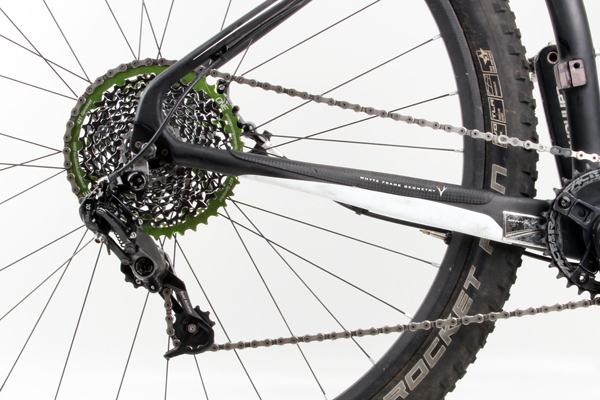
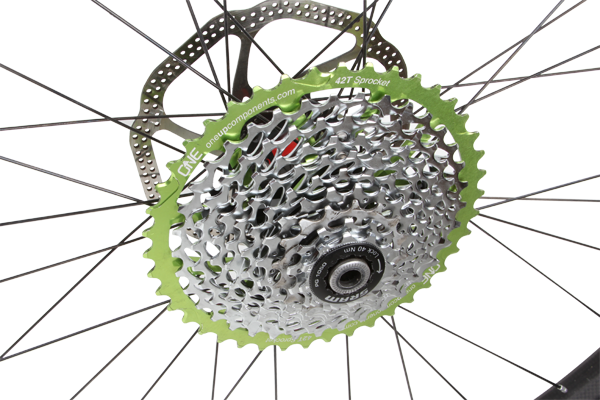
If you can't justify the expense of a new drivetrain, there are some cheaper alternatives that provide an expanded gear range on your existing setup. A number of manufacturers offer individual 42 tooth cogs that are designed to fit behind a regular 10-speed cassette — you just need to pluck another cog from somewhere within the cassette to make room for the 42-tooth dinner plate. Brands include Hope Technology, Wolf Tooth, Absolute Black, One-Up, Ari Bike, MTB Tools, Kazety Colonel Werk and more. For around $100 you can turn your existing 10-speed cassette into something that comes very close to matching the total gear range of a wide-range 11-speed system.
So let's run through the conversion and most importantly, see how it performs.
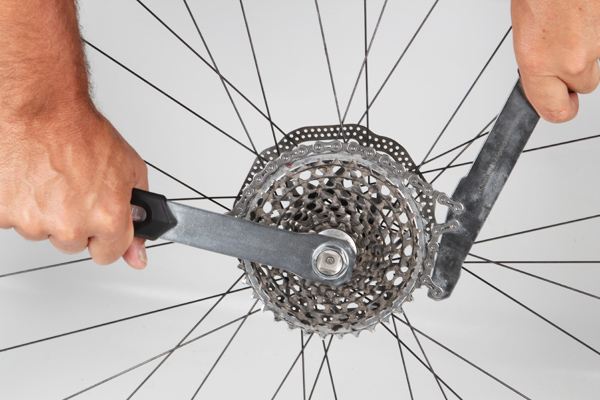
Start by removing your cassette—you’ll need a chain whip and a splined cassette tool for this. These add-on 42-tooth cogs are designed to work with 10-speed 11/36 cassettes, as the jump from the 36 up to the 42 isn’t too big (in fact it mirrors the two lowest ratios that you’ll find on an XX1 cassette). A 12/36 cassette can also work but obviously the gear spread won’t be as wide. Not every 10-speed cassette will work and the cog manufacturer will usually stipulate which cassettes are compatible.
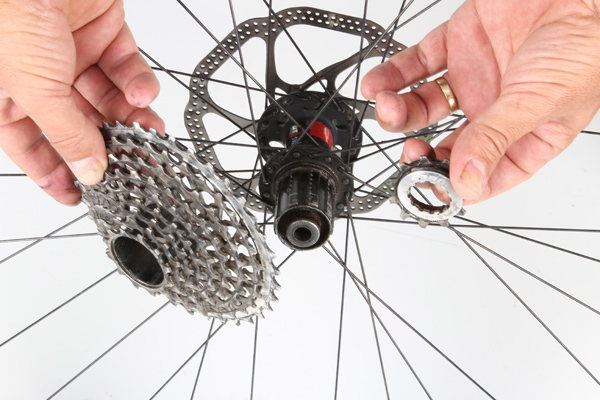
In addition to the 36 cog, your donor cassette needs individually mounted cogs lower down on the cassette so that one can be removed. In this example, our bike had a one-piece SRAM XX unit, so the cassette had to be swapped for a cheaper model — we went with a PG-1050. If you’re faced with a similar scenario, we’d recommend sticking to like-branded parts; run a SRAM cassette if you’ve got a SRAM chain and derailleur, or stick with a Shimano cassette if it’s the other way around. Mounting a massive 42 cog with a rear derailleur that wasn’t designed to take anything bigger than a 36 places extra demands on the shifting; the last thing you need is a mix and match drivechain adding even greater potential for shifting problems.
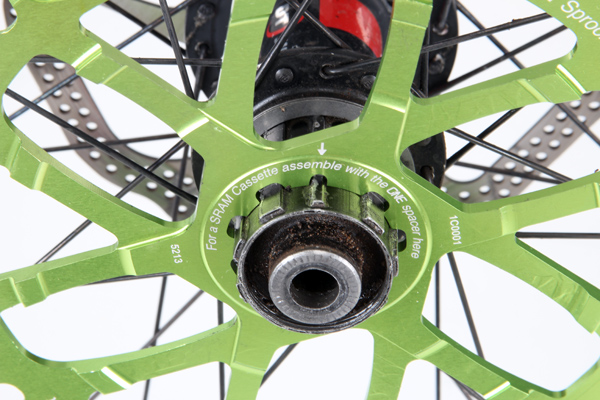
Some cogs will come supplied with spacers that allow them to work with either SRAM or Shimano cassettes. Others are machined with the correct spacing and offset to work with a specific brand. Start by following the instructions given by the cog manufacturer but don’t be surprised if you need to fiddle and tweak the setup a little to get it to work. Our One Up cog is meant to have a thin spacer behind the cog and one spacer in front when using a SRAM cassette. We found the shifting to be less finicky when both of the supplied spacers were placed in front of the cog (between the 42 and the regular cassette). The message; don’t expect everything to run 100% as intended when doing custom modifications such as this.
With the 42 cog in place, slide on the larger cogs from the cassette as usual (there’s one thin spline on the freehub body that you’ll need to line everything up with). With add-on 42-tooth cogs, the manufacturer will usually instruct you to remove the 17-tooth cog and one spacer adjacent to it. This typically leaves a four-tooth gap in the lower part of the cassette, so your cassette will go: 11/13/15/19/22/25/28/32/36/42. A four tooth gap can be pretty noticeable at the smaller end of the cassette, so another option is to find an individual 16-tooth cog and remove both the 15 and 19 cogs to give you more consistent three tooth jumps. Some brands will provide an extra 16 cog as part of the conversion package — certainly a worthwhile option.
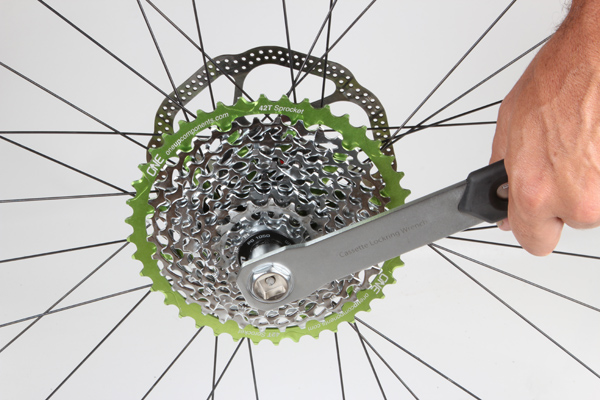
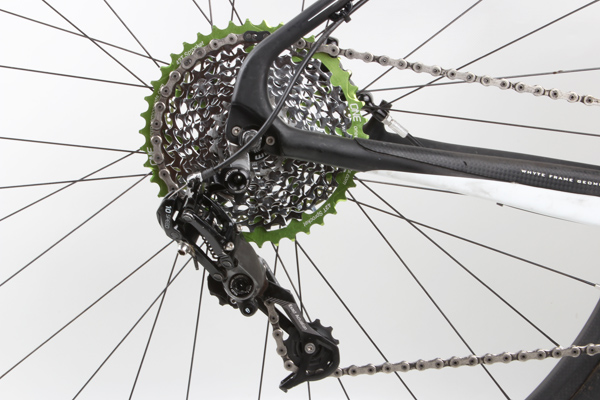
With all the cogs and spacers in place, refit the lock ring and tighten. Don’t get too carried away with torqueing it up as you may have to pull it back off again to fiddle with the spacing and cog options — we had to do a little trial and error with different doner 16-tooth cogs before everything meshed. The end result was a pretty schmick looking 10-speed cassette with the following ratios: 11/13/16/19/22/25/28/32/36/42.
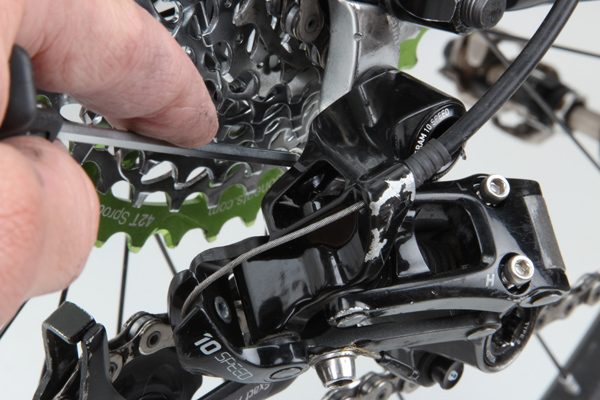
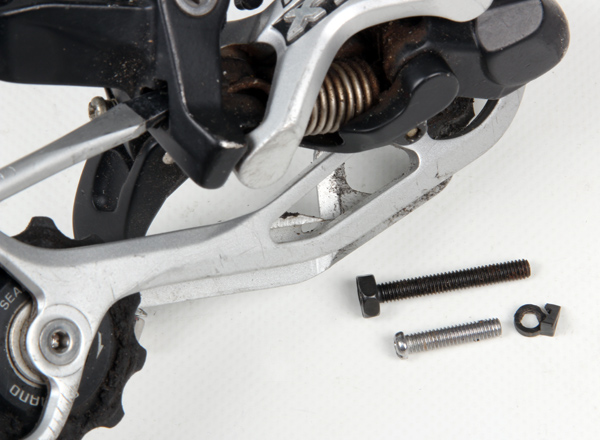
Refit the wheel with the chain placed on the smallest rear cog. There are three small adjustment screws on your rear derailleur. The first two are the ‘high and low limit screws’; they restrict the side-to-side travel and when adjusted correctly, they stop the chain derailing into the spokes or dropping off the smallest cog (they’ll usually be marked ‘H’ and ‘L’). The other one is the ‘B-tension screw’; it adjusts how far the derailleur sits away from the cassette and this is the one you need to adjust at this point. Using a small screwdriver (or an allen key for certain SRAM models) wind the B-tension screw most of the way in (clockwise when looking from the rear of the bike).
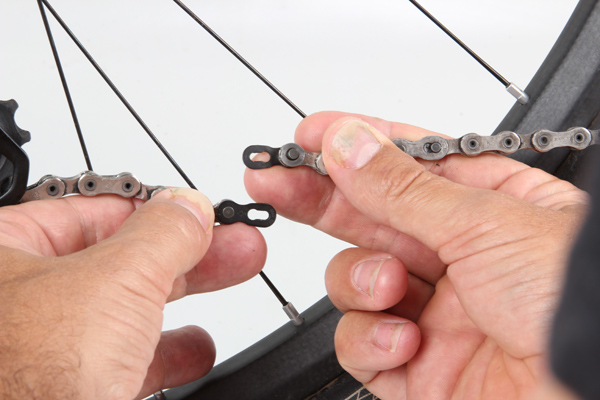
Shift gears until the chain is up in the 36 cog. Check that the derailleur cage isn’t stretched to its limit and there’s still enough slack in the chain to handle the step up to the bigger 42 cog. If you’re converting from a multi-ring drivechain and fitting the big cog at the same time, the chain may already be long enough. If you’ve already shortened the chain to suit a one-by conversion, you may need to add some links before shifting into the 42 cog. With a bike that’s already converted to 1X10, you’ll probably need to add between two and four individual links to the chain to handle the new big cog.
Most modern chains need special pins or connector links to join them up, and you’ll need the extra chain links too. If you don’t have these handy, you may want to buy a new chain and cut it to suit. On a hardtail, setting the chain length is a pretty straightforward affair and what you see is what you get. With a dually the chainstay length can increase as the suspension is compressed, so you’ll need to take this into account. The safest bet is to deflate the shock and set the chain length with the suspension bottomed out, then double check that it’s not too long once the shock is reinfl ated. Don’t shift into the 42 cog until you’re sure there’s suffi cient chain length or you risk damaging the derailleur.
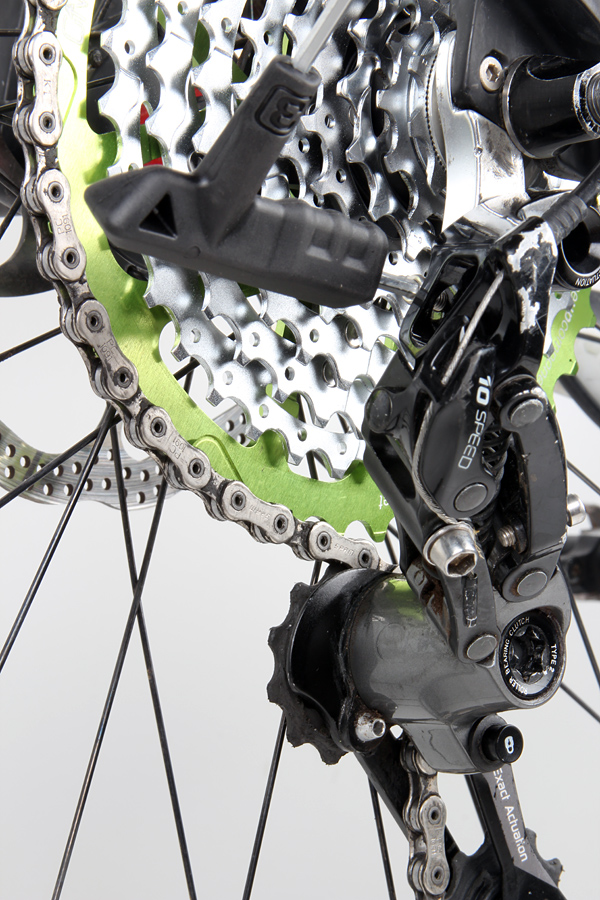
With the chain length corrected, shift into the new cog and check there’s sufficient clearance between the upper jockey wheel and the 42 cog. The best shifting is usually achieved by positioning the derailleur as close as possible to the big cog. Unwind the B-tension until there’s only 3-4mm clearance between the jockey wheel and the 42 cog. Try shifting back and forth between the 36 and 42 cogs and tighten the B-tension if the derailleur clashes with the cassette.
If you can’t get suffi cient cog clearance with the B-tension wound all the way in, you’ll need to tweak things a little further. There’s often a small nylon locking washer located under the screw—removing this will increase the adjustment range a little and may solve the problem. Alternately, you can source a longer screw from an engineering supplies store or nuts and bolts shop.
With all of these parameters set, it’s time to adjust your gears as you normally would with the cable tension (it’s also worth checking the H and L limit screws too). Sometimes the gear adjustment will be easy and other times it’ll be pretty frustrating — it really depends on the bike and a whole range of variables. I’ve done this wide range conversion on a number of different bikes and each produced differing results. As the B-tension screw has been adjusted to suit the 42 cog, the derailleur now sits further away from the cassette. This can compromise the shift quality in the smaller cogs on the cassette. Whether you’ve added a substitute 16 cog or simply removed the 17, you’ve still messed around with the shift ramps that help modern derailleur gears shift as well as they do. As a result we usually experienced slower shifting around the 16 cog as well as up to the 42 — it works but you’d sometimes need to give the shift lever an extra nudge to execute a gear change.
So there you have it; with an 11/42 cassette, a clutch derailleur and a wide/narrow chainring you get the same clean looks as a 1X11 drivechain and a total gearing range that comes very close to an 11-speed setup. On the negative side, the shift quality can be a bit iffy with some odd gaps between gear ratios. While the concept is simple, there are numerous complications that you may encounter along the way. If you’re not competent with doing your own gear adjustment then this modification is best left to your local bike shop. It’s pretty clear that you get what you pay for but the relative affordability of these homebrew wide range cassettes is likely to bring plenty of tinkerers out of the closet.
The 2022 Checkpoint legitimately feels like several bikes in one - all road, adventure, gravel and super commuter. The design, finish, attention to detail and subtleties all add up to make a fantastic looking and exceptional performing adventure machine.

 With the current trend towards single ring drivechains, ultra-wide range cassettes are becoming a hot-ticket item. Here we look at a more affordable way to get a wider gear range for your one-by conversion.
 With the current trend towards single ring drivechains, ultra-wide range cassettes are becoming a hot-ticket item. Here we look at a more affordable way to get a wider gear range for your one-by conversion.