Indoor Training Ideas
 Feeling flat and lazy from a lack of riding this winter? Well grab an indoor trainer and do something about it!
To many, the thought of sweating away on an indoor trainer whilst staring at a wall is about as appealing as root canal therapy. While it’s never going to be as engaging as a proper ride, the practical benefits of using one are many.
If you’re a city dweller, it’s likely that getting to the trail involves a drive, and this in turn means sitting in traffic—something that’s possibly less appealing than riding indoors. An alternative is riding on the road; most likely in the dark after work mixing it with psychopathic road ragers—not only is this unappealing, it can be life threatening. Of course there’s always the option of doing nothing, but a simple bit of fitness maintenance through the colder months will find you in much better shape when the days get longer and the opportunities for riding fun open up once more.
One of the most attractive things about an indoor session is the time effectiveness. There’s no stuffing the bike into a car, no standing around at traffic lights, it even saves time in getting dressed as you won’t need to layer up in winter gear. You climb on your bike, do a warm-up, ride a pre-planned session, cool down and you’ll be done in well under 60 minutes. Do this once or even twice a week, toss in the odd night ride to keep the skills up and you may emerge from winter fitter than ever before.
If these points have you contemplating a few indoor trainer sessions the real key is to get a plan. It’s no use just sitting and pedalling aimlessly for half an hour. You really need a goal and a program to follow; otherwise you’ll lack focus, get bored and give it up before long.
What follows are a few ideas on pre-planned sessions that will help you target different areas of your fitness. Each session should take 30-60 minutes and can provide a better quality workout than you’d get in two hours on the trail.
Strength
Begin with a 15 minute warm up. Once ready, select a gear that makes it reasonably hard to pedal while still being sustainable. Push this gear for five minutes at approximately 90 pedal revolutions per minute (rpm). At the end of five minutes, shift up one gear and repeat the effort for a further five minutes, again at 90rpm. At the end of that, increase the gearing again by another sprocket and repeat for a further five minutes. After 15 minutes of hard work, you now have a choice. You can either descend back through the gears in five minute blocks, still at 90rpm, or recover for 10 minutes before repeating the 15 minutes of progressive overload again.
Cool down with 15 minutes of low intensity pedalling.
Leg Speed
For this one it really helps to have a cycle computer that offers a cadence reading. If you don’t have one, you can still follow it in basic terms by counting your pedalling rhythm—it doesn’t need to be precise.
Begin with a 15 minute warm-up. Start your workout by pedalling in a relatively low gear, at just 80rpm. For every minute, increase your rate of pedalling by a further 5rpm. Continue to increase your leg speed until you begin to bounce in the saddle. Once this begins, gradually decrease your leg speed at a rate of 5rpm each minute until you are back at 80rpm.
After a 10 minute easy recovery, repeat this effort again.
Cool down with 15 minutes of low intensity pedalling.
Intervals
Begin with a 15 minute warm-up. Once ready, ride as hard and as fast as you can for one minute. After the interval, recover in a low intensity, easy to pedal gear for five minutes. Repeat the effort three more times, each followed by the five minute recovery.
Cool down with 15 minutes of low intensity pedalling.
As you begin to improve your fitness, this workout can be easily modified. You can add more intervals, you can increase the time at your maximum effort, or you can shorten the amount of recovery.
Once you are no longer able to complete the specified interval, begin your cool down. Attempting efforts when tired can lead to the development of poor techniques and can cause you injury.
Next Level Fitness
With all of these work outs, their specificity can be increased by using heart rate monitors or power measuring tools. These are not necessarily a ‘must have’ but they will ensure that the time you spend riding can be optimised. To get the most from this type of training, it can often be worth contacting a coach to point you in the right direction.
Each session on your trainer should be specific and done with a goal in mind. Without it, you’re on the long, lonely road to ‘indoor trainer hell’. So make sure that you use these sessions to work on aspects of your fitness including your strength, leg speed or even your ability to tolerate the build-up of lactic acid through interval sessions. Combating the boredom of indoor trainers is the key to a successful winter and applying some basic structure to your workouts will help you to accomplish this.
Getting Started
If you don’t already own an indoor trainer, here are a few points that’ll help you get a workable and effective setup.
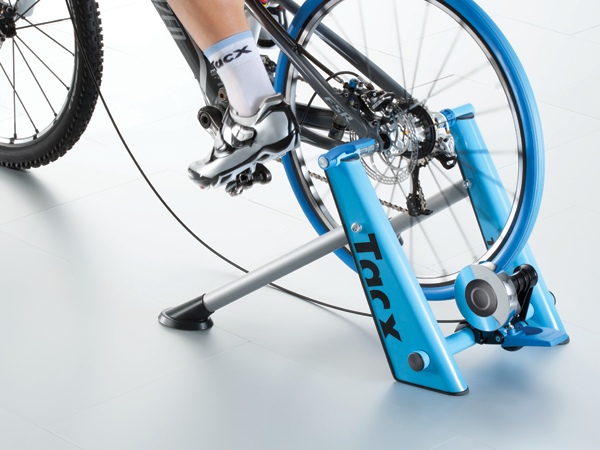
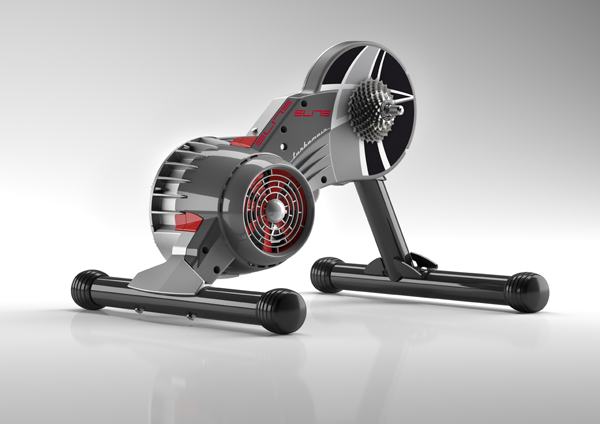
Most indoor trainers mount to the rear of your bike with the tyre driving a roller. With a knobby tyre they’ll make an absolute racket, so consider rigging up an old spare wheel with a slick tyre for your trainer sessions. If you own a road bike, just use that for your trainer sessions.
Some units get around this issue by applying the resistance via rubber wheels that contact the rim. These can be a good way to solve the noise and tyre wear issues without swapping to slicks but they are less common and won’t work on some disc brake specific rims (there needs to be enough rim sidewall for the roller to push against).
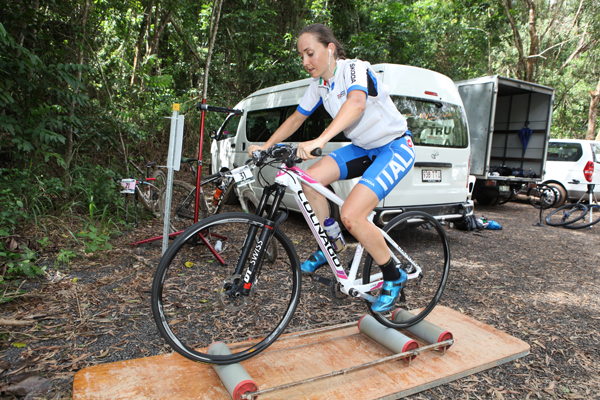
Additionally, you are likely to encounter compatibility issues if your mountain bike has some form of thru-axle on the rear wheel. Some brands make adaptor kits (Cyclops and Kurt Kinetic for example) that can convert certain thru-axle systems to work with a rear wheel mounted trainer. Alternately revert again to using a road bike or maybe consider using rollers if you have to ride a thru-axle equipped MTB.
There’s limited airflow indoors, so you’ll get hotter and sweat more. If possible, set yourself up in a well-ventilated room with a large fan to keep you cool. Keep the clothing minimal and remember to drink to stay hydrated.
Feel free to try get the music pumping or just watch a DVD. You could also consider inviting some mates around for a group trainer session; make it a regular thing and motivate each other!