Like the idea of simplifying your drivechain but don’t want to get tattoos and become a single speeder? Well a single-ring conversion could be the answer.
Single ring setups have been popular for many years and things really took off when SRAM launched their XX1 drivechain. Since then the options have expanded massively with 1X specific chainrings and a growing range of clutch-style rear derailleurs. Combine the right selection of parts and you'll have much of that desirable XX1 simplicity for a fraction of the cost.
Of course a regular nine or 10-speed cassette won’t match amazing gear range offered by the newer 11 (or even 12) speed set ups, but for some people and some riding areas the gear ratios will suffice. A single ring drivechain mightn’t be able to equal the total range of a 2X or 3X system but you can select a chainring size that’s most appropriate for your trails. Faced with a particularly hilly ride? Just swap to a smaller chainring and away you go. Obviously there’s a limit to how small a chainring you can fit (a 30T ring is the smallest that’s commonly available for a 104 bolt circle), but you can still get a respectable low gear when using a regular old 11-36 cassette — in most cases you only loose the two or three easiest gears when compared to a multi-ring setup.
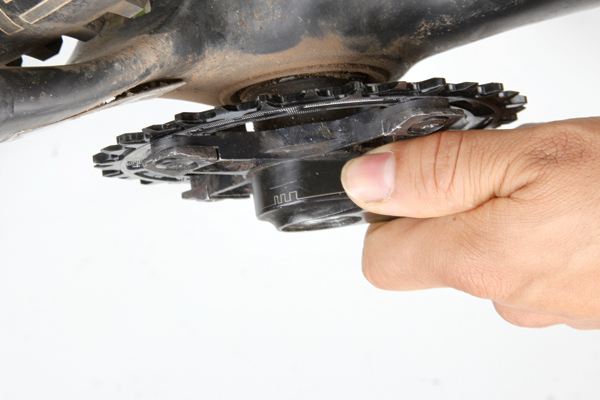
For the ultimate budget 1X setup, you can also fit an extra large cog to your regular cassette as shown here. These modifications may compromise the shift quality in some cases but the total gear range can equal some 1x11 setups.
So let’s take a look at what’s involved in ditching your chainrings and how to perform a tidy 1X conversion on your older multi-ring steed.
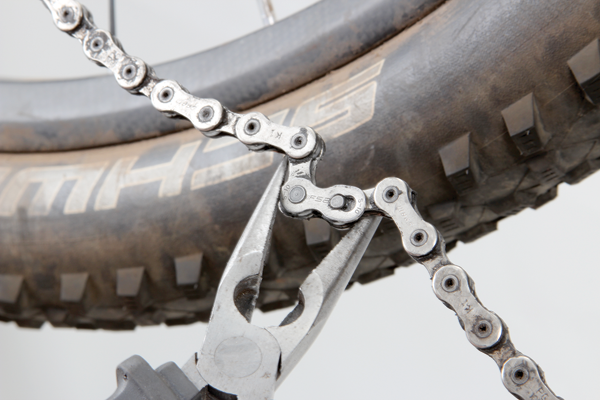
Start by removing your chain. In most cases you’ll need to split the chain to remove the front derailleur and you may wish to shorten your chain once you complete your 1X conversion. Just ensure that you’ve got the tools or parts required to reconnect it. With Shimano chains you’ll need a new joining pin. SRAM 10 and 11-speed Power Lock joiners are single-use items and should be replaced. Older nine-speed SRAM Power Links are reusable, as are some other joiners (KMC 10-speed, Wippermann and so on).
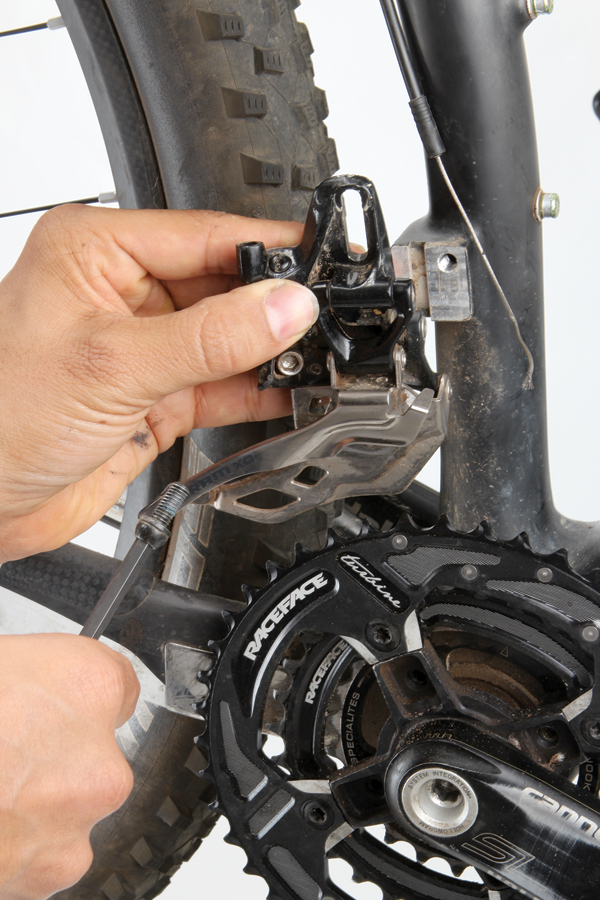
With the chain out of the way it’s time to strip everything off. Undo the gear cable and unbolt the front derailleur. Unless you’ve got split-clamp style brackets for your gear/brake levers, you’ll probably need to remove your left-side grip to slide the front shifter off. Use a compressor nozzle to blow air under the grip and slip it off. If you don’t have an air compressor, squirt some water or alcohol under the grip to free them, or just get lock-on grips as they make this task far easier.
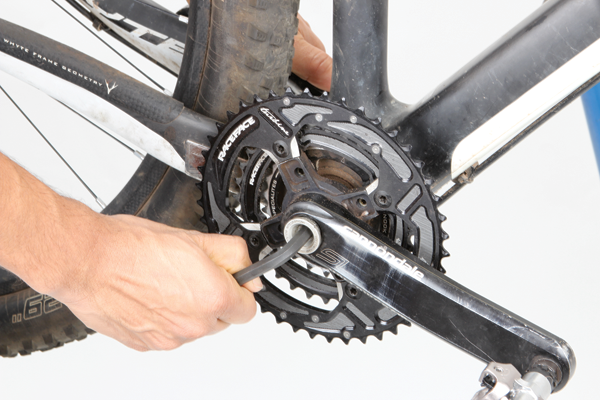
In most cases your cranks will need to come off to remove the chainrings. Some cranks are removed by simply undoing a regular 8mm allen key—this is the case with most SRAM/Truvativ models. Shimano cranks are secured by a couple of 5mm allen bolts but you’ll need a special tool to undo the preload adjusting cap. Many older crank designs require special extractors to pull the arms off the bottom bracket axle. Whatever the case, ensure that you’d got the right tools on hand before you get stuck into your project.
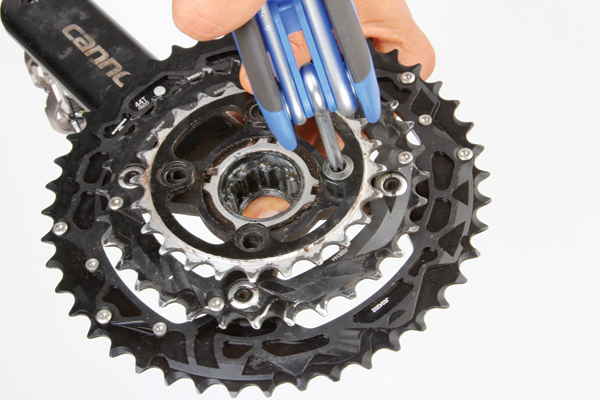
As the final step in this cleansing process, remove all of your unwanted chainrings. You’ll either need a 5mm allen key or a torx wrench for this. In some cases you may need a specialist tool to hold the backside of chainring bolts. If you’re planning to use a guide to keep the chain in place, you could reuse the middle chainring but it’s advisable to get a single-specific chainring for the task. If you had a triple crankset, place your new cog in the middle ring position. When converting a double ring, the placement will depend on the crank and chainring combination that you are using (the main goal here is to achieve a good chainline).
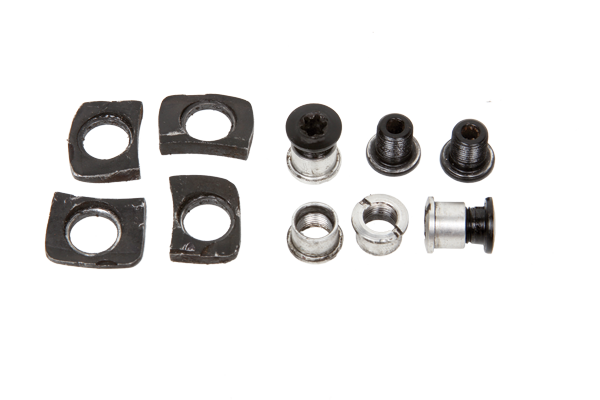
With your new single ring in place, you’ll probably find that the original bolts are too long. While you can opt for shorter single-ring specific bolts, it may be easier to rig up spacers that take the place of the now absent big ring. In this case I cut the tabs off an old big chainring but Race Face ‘chainring tab shims’ do exactly the same thing. This approach ensures the chainring bolt goes all the way through and the cut down chainring tabs act as a large washer to better distribute loads through to the spider — something you need to consider with lightweight cranks.
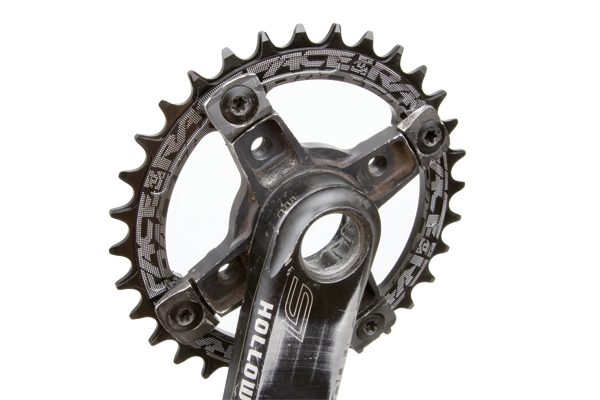
And here’s the finished product. We opted for a 32T Race Face Narrow/Wide chainring. With a triple crankset, you'd usually place the 1X ring in the middle position.
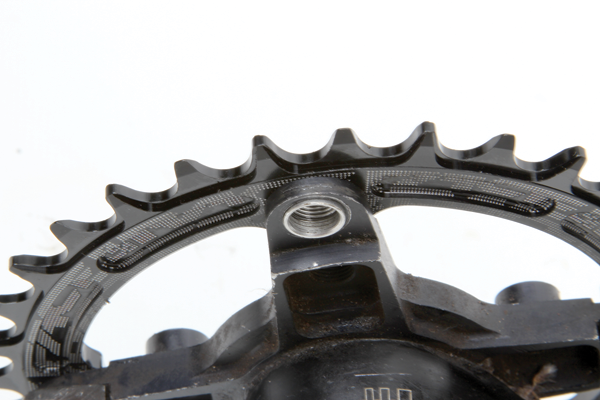
Slip your crank back on and check the frame clearance. In this case there wasn’t a problem as the new ring is the same size as the middle ring that it replaced. When mounting a bigger chainring (or placing the cog in a more inboard position), you may encounter clearance issues. Ideally there should be at least 5mm of breathing space between the chainstay and the teeth to allow for flex under heavy pedalling load. Once you are content that there’s ample clearance, refit and torque the cranks as recommended by the manufacturer.
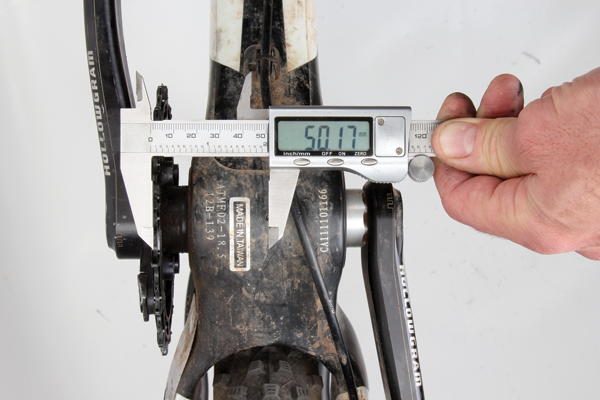
Check that the chainline is within a normal range. Find the centre line of your frame and measure out to the centreline of the chainring. The teeth should sit somewhere between 47 and 52mm out from the centre of the bottom bracket (or 50-55mm if its a newer 'boost' equipped model). If you get a measurement that’s way out of this range, you may be able to shift the chainring position by adding or removing spacers from the bottom bracket. If the bottom bracket doesn’t allow for any adjustment (often the case with press-fit systems), you can also tweak it by using chainring spacers or reposition the chainring on the cranks.
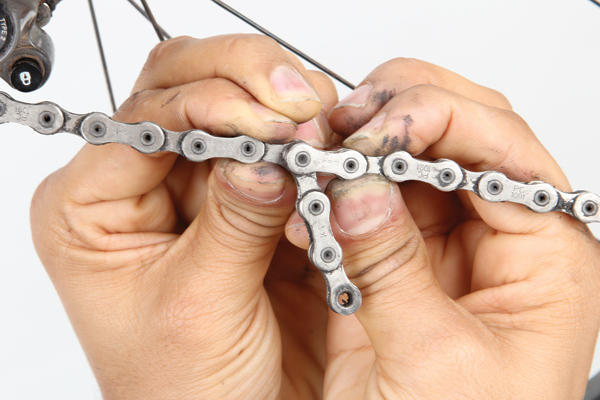
Thread your chain back through and check its length. As it no longer needs to wrap around the big ring, you may be able to remove a link or two. Shortening the chain can add a little extra tension when you’re in the smaller cogs on the rear cassette. Without going through the derailleur, wrap the chain around the two biggest cogs and pull the ends together. Add four links to this length; in our example that means three individual links plus the joiner. This will get you in the ballpark but you need to double check this measurement before you hit the trail. With the chain back on, check you can use the two biggest cogs without over extending the capacity of the derailleur. On a dually, always measure and check your chain length with the suspension fully compressed (deflate the rear shock), as the chainstays generally increase in length as you go deeper into the travel.
And you’re done! Converting from a triple on this hardtail lopped 413g off the total weight. If you’re swapping from a double, the savings will still be within 50g of this amount as most of the weight reduction comes from removing the shifter and front derailleur (the chainrings themselves don’t weigh much). While the weight loss doesn’t hurt, we see the simplicity, added ground clearance and improved chain retention as the biggest attractions. A guide-free setup such as this is also extremely quiet on the trail and you’ll have more handlebar real estate for dropper post or suspension remotes.
The 2022 Checkpoint legitimately feels like several bikes in one - all road, adventure, gravel and super commuter. The design, finish, attention to detail and subtleties all add up to make a fantastic looking and exceptional performing adventure machine.